Photeeq Lens Flare in Creative Photography
Photeeq Lens Flare
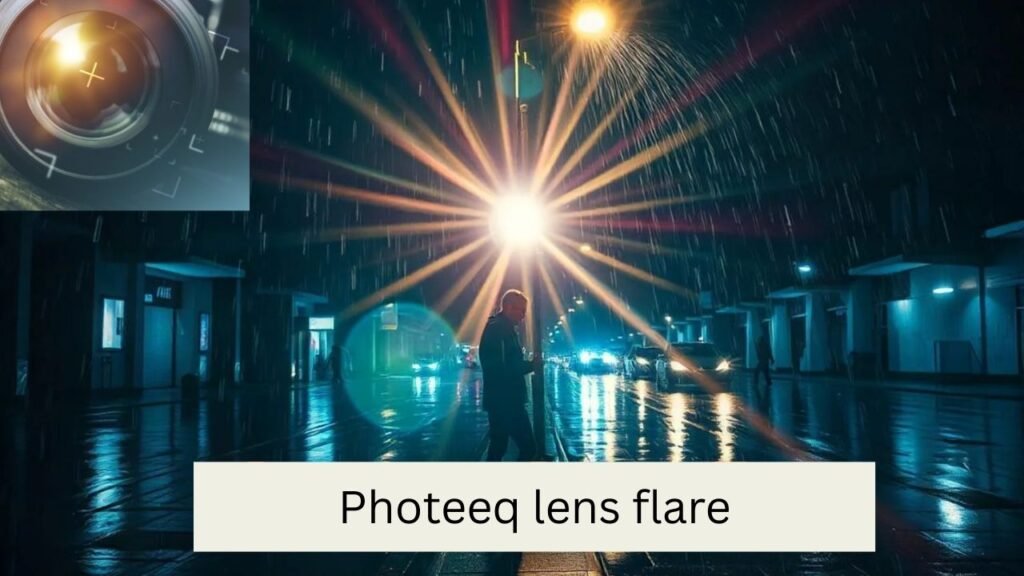
Lens flare often appears in photos when light scatters inside the camera lens. It’s more common than you think. When this happens, it can create bright spots, faded lines, or haze. This is called photeeq lens flare. For many, it’s a mistake. For others, it’s a creative tool.
This article breaks down how it happens and how to control it. Whether you want to use it or avoid it, we’ve got you covered. You’ll learn when it’s useful, when it’s not, and how to edit it away if needed. Flare can shape the mood of an image. Or it can ruin a perfect shot. The goal is knowing the difference.
What is Photeeq Lens Flare?
Photeeq lens flare is a visual effect caused by bright light. The light hits the lens, then bounces between elements inside. Instead of hitting the sensor cleanly, the light spreads out. That’s how you get rings, blobs, and streaks. Sometimes this flare looks like circles. Sometimes it creates a soft haze. Either way, it changes your photo. It’s not always bad. In some cases, you might want to add flare for mood or color. In others, you’ll want to avoid it.
Photeeq lens flare happens with both natural and artificial light. The sun, streetlights, or even bright LEDs can cause it. It’s especially visible when shooting at low angles or with strong backlight. You’ll see it more with certain lenses or filters too.
What Makes Photeeq Lens Flare Happen?
It often occurs when strong light enters the lens and reflects between its internal surfaces. This scattered light produces various visual artifacts like orbs or hazy streaks. Understanding the source helps photographers prevent unwanted effects and better control their images.
| Cause | Effect |
| Bright Light | Bounces around inside the lens |
| Cheap Filters | Makes flare worse |
| Dirty Lens | Scatters light |
| Zoom Lenses | More parts = more flare |
| Bad Design | Reflects too much light |
These causes all contribute to this lens flare in different ways. While some flare adds mood, unwanted flare can ruin clarity. Using better gear and techniques minimizes these problems in most settings. But knowing these reasons helps you control it. Using better gear and angles can reduce it.
Types of Photeeq Lens Flare You’ll See
There’s more than one type of flare. Each looks different in photos. Some are soft and dreamy. Others are sharp and distracting. Knowing the difference helps you choose the right mood.
1. Veiling Flare
This one is like a fog. It spreads across your picture. It comes from light just outside the frame. You won’t see a direct light source, but your photo looks washed out. Contrast drops. Shadows fade. It can look dreamy or dull. Older lenses often show this more. New ones with coatings do better.
2. Ghosting Flare
This type looks like circles or dots. Sometimes they’re lines. They follow the light source. You may see them near the edge of your photo. The shapes depend on your aperture. Small openings create crisp shapes. Wide ones make them soft. More lens elements mean more ghosting.
3. Red Dot or Sensor Reflection
A tiny red spot can show up. It’s not a mistake in your camera. It comes from light hitting the sensor and bouncing back. Mirrorless cameras often show this. It’s more common at certain angles. You may see it during sunset or with strong backlight. Better lenses help reduce this.
How Your Gear Affects Photeeq Lens Flare
The tools you use can make or break how this lens flare shows up. Certain lenses, filters, and even how clean your equipment is play a big role. Knowing how your gear influences flare will help you shoot better photos under tough lighting conditions.
| Gear Part | Why It Matters |
| Focal Length | Short ones flare more |
| Filter Quality | Bad ones cause scatter |
| Lens Hood | Blocks stray rays |
| Lens Coating | Reduces reflections |
| Cleanliness | Dirty lenses catch more light |
If you want fewer problems with photeeq lens flare, upgrade your filters and use lens hoods. Keep your gear spotless. Better equipment gives you better control over light scatter and unwanted visual effects. Use hoods. Clean the lens before every shoot.
Creating Beautiful Photeeq Lens Flare On Purpose

Sometimes you want the flare. Not too much, just enough. It can make a photo feel warm or dramatic. Use it in the right way, and it makes your image stand out.
1. Face the Sun
Turn your camera toward the light. Let the sun or bright light shine in. You’ll get glowing bursts or soft haze. Try different angles. Even small changes matter. Move left or right. Tilt up or down. Each change gives a new flare shape.
2. Use Backlight
Put the light behind your subject. It outlines their shape. It can wrap around hair or shoulders. It works well in portraits. Try it in the golden hour. The light is soft and low. The results are gentle and pleasing.
3. Change the Aperture
Your aperture changes the flare. A small opening creates sharp rays. A wide one gives soft blobs. Try f/2.8 for a glow. Try f/16 for a sunburst. Adjust until you like the look. Try shooting the same scene with different settings.
4. Try Different Lenses
Every lens behaves differently. Older lenses may flare more. New lenses are often coated to resist it. A wide lens gives large shapes. A long lens might give smaller ones. Try switching lenses to see what changes.
5. Shoot at Night
Try city lights or moonlight. These are great sources of bright points. Shoot near streetlights. Try different distances. Some flares will streak. Others may pop up as soft dots. Night shots give you more control.
Easy Ways to Avoid Photeeq Lens Flare
Light flare can change your photo. It sometimes adds glow, but often distracts. To get clear photos, you should try to prevent it. These steps are easy and work in any light.
1. Use a Lens Hood
A lens hood blocks side light. This keeps flare away from your lens. It helps you shoot in the sun. It also protects your lens from dust and bumps. If your lens did not come with one, buy one that fits. It’s a cheap and useful tool. It makes your images clearer and sharper.
2. Stand in the Shade
Shade can lower bright light. Try to shoot where shadows cover your lens. You can stand under a tree or a roof. This keeps direct rays away. It helps reduce bright streaks. Your photo gets better color and contrast. Shade is natural and free.
3. Change Your Shooting Angle
Move around before you shoot. Don’t face the sun straight. Turn your body slightly. Try different spots and heights. See how the light hits. Even a small change helps. It can block unwanted light. Better angles mean better photos.
4. Keep Your Lens Clean
Dust reflects light inside. So do smudges and fingerprints. Clean your lens before each shoot. Use a soft microfiber cloth. Don’t use tissue or fingers. Clean gear means clean results. A clear lens captures clear details.
5. Try Prime Lenses
Prime lenses have fewer parts. This means less light bounce inside. They are often sharper too. They show less distortion. Use one if you want to cut flare. They are good for low light and outdoor shots.
Editing Photeeq Lens Flare Out of Photos
Sometimes flare sneaks in. You might not see it until later. Don’t worry. You can fix it during editing. These tools and steps help you clean it up.
- Clone tool to remove spots
- Heal tool to patch areas
- Adjust brightness and color
- Use layers to mask flare
Flare doesn’t ruin a photo forever. You can fix it step-by-step. Use healing tools, masks, or color fixes. Take your time and work gently. Good editing brings back the photo’s beauty. Practice makes you better over time.
When to Use Photeeq Lens Flare for Style
Sometimes, adding light flare on purpose makes your photo better. It brings warmth, emotion, and a dreamy feel. Many portrait and nature photographers use it this way. When shooting at sunrise or sunset, flare can add magic to the scene. It works well when the light hits from behind your subject. That glow can make the subject stand out. Just make sure it fits the mood you want to create. Too much flare can still ruin the shot.
Use it in moments that feel soft and emotional. Candid portraits, outdoor walks, or calm travel scenes are good options. You can also try it in fashion shoots or music videos for a bold look. Test different angles and light sources. Try backlighting to get that golden ring around your subject. Keep checking your screen to avoid overdoing it. A small amount of photeeq lens flare adds style. Use it like seasoning in food just enough to make it better.
Quick Tips for Better Photos with Photeeq Lens Flare
Getting better photos means doing small things well. These tips are simple and useful. Try them before, during, and after your shoot.
- Buy pro-grade lenses
- Don’t shoot at noon
- Let trees block sunlight
- Try new angles
- Practice in different light
These quick tips are easy to remember. They help stop problems before they start. Good gear and smart habits go a long way. Keep trying different setups. With time, your photos will shine without unwanted flare.
FAQs
Q1: Can photeeq lens flare damage my photos?
It can lower contrast or hide details. But you can control it with better angles and gear.
Q2: Is lens flare only from the sun?
No. Any strong light source can cause it. Even indoor lights or streetlamps at night.
Q3: Can I add lens flare later?
Yes. Many editing tools let you add fake flares to boost mood in photos.
Q4: Should beginners avoid photeeq lens flare?
Not always. Learning how to manage photeeq lens flare helps build better photo skills.
Q5: What lens works best with photeeq lens flare?
Older lenses or wide-angle lenses often show beautiful flare. But it depends on the scene.
Final Thoughts:
Photeeq lens flare is more than just a light error. It’s an effect you can control. It adds mood, story, and energy. Or it can be removed for clear, crisp results. You choose how to use it. Keep your camera gear clean. Try different shooting times. Learn how light moves through your lens. Use high-quality filters and lens hoods. With practice, photeeq lens flare becomes easy to manage. Whether you want to avoid it or include it, you’ll know what works. It’s one of those small tricks that makes your photography better. Keep learning, keep experimenting, and let the light work with you—not against you.
Read More Blogs :-


